Understanding About Smartphone Camera Settings and Features
Understanding About Smartphone Camera Settings and Features

It seems to be true what analysts are saying that future camera innovations have led to flexibility that is weight and size. If we speak the class still camera, then the innovation leads to Mirrorless which comes with smaller size and lighter weight of the DSLR, but the performance is difficult to compete with DSLR. As for the smartphone camera, the fact that today's smartphone camera technology has most of the features available in DSLR cameras. That is, smartphone users get a great opportunity to explore photography with their smartphones.
In this article I will explain the important settings and features that are common in today's smartphone cameras. Usually ordinary users only recognize the effects of the camera and rarely fiddle with their smartphones to find out what are the advantages of the camera. Hopefully my explanation this time helps you to maximize your smartphone camera. Some unification is quite familiar, and understanding how it works will make it easier for you to adapt and operate DSLR cameras.
ISO

Many ordinary users never manage the ISO manually, so ISO is still in auto settings. Simply put that the ISO is a setting to increase the brightness of the image. The higher the ISO value, the brighter your image. But since the ISO is "auto", so the value is determined by the program. And you can determine for yourself what the ideal ISO value according to your needs. Just keep in mind that high ISO can cause noise (freckles) in the picture. Consider the comparison of the image below which uses ISO 200 and ISO 800:

The ISO value of safe that is often recommended is max ISO 800.
White Balance (WB)
The White Balance setting is marked with the WB abbreviation symbol. While some smartphones use the name Auto White Balance (AWB). The function of this setting is to compensate for the light temperature at which you shoot so that the image has a normal white temperature. It is therefore called "White Balance".

Each White Balance has been prepared to deal with certain temperature conditions, such as daylight, cloudy, under the light of a yellow (inscandescent) or fluorescent bolamp. You should only use White type The balance corresponding to your situation takes a picture, so that the image produces a suitable temperature, not too yellow or an excess of blue.
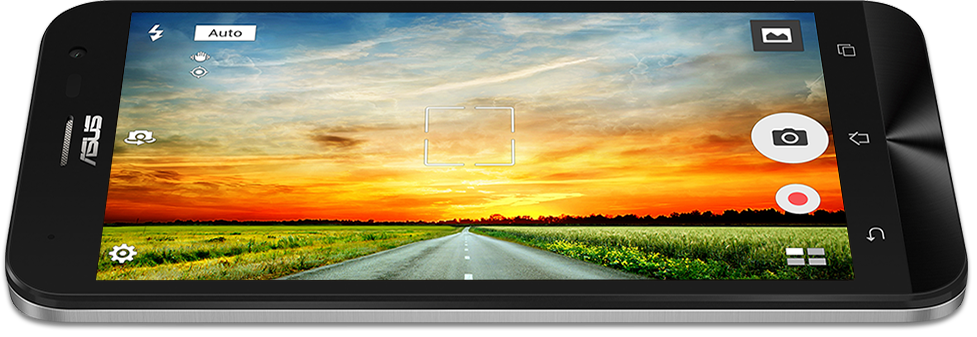
Grid Line
The grid line is the waveguide line for the Rule of Thirds composition, generally consisting of 3 vertical lines and 3 horizontal lines, so that it generates all 9 boxes in your camera's camera screen. Take a look at the image below:

Use this line to adjust the balance of scenes you will catch. Even if you do not understand photography, at least you learn how to produce a neat image, not tilted here and there. Well, use this line to help you do that. Then, as I said above, the gird line is used to construct the Rule of Thirds composition and help you place the subject to be more proportionate or pleasing to the eye. It's not just about placing the main subject, but with this rule you can easily set the symmetry of objects in landscape photos (landscape), by choosing the horizon line as a benchmark.
Understanding Metering

The advantages of the camera on the smartphone is now equipped with metering mechanism that follows the metering on the DSLR, using the concept of Gray 18% work. You may not have to go into this now and I will explain the important part of it. Try pointing your smartphone's camera at a dark object then move it to a bright object, you will see the difference in the brightness of the image of both objects. This is due to the metering mechanism that takes Gray 18% as a benchmark for normal brightness. You do not have to figure out how it works. However, you should always remember that your smartphone camera will produce different lighting on dark or bright objects. This you can use as a trick to enlighten the subject. So suppose you take a picture of someone using a black shirt, you can put the focus on the subject shirt so that it will automatically add to the overall brightness of the image.
Focus Point
Generally on the camera camera screen there is a small box that can be moved position with the touch of a finger. That small box that functions as a focal point in the smartphone camera. If the box is green it means the subject has been locked / focused. If it's red, it fails to focus and you just have to press the smartphone screen again until the box is green.
If when pressing the camera screen instead of locking focus but instead of taking pictures, then please change your camera settings. It should also be understood that the success and failure of the smartphone camera to focus can also be caused by the lighting conditions and the distance of the camera with the subject. Low light conditions can cause the camera program difficult to lock the subject well. Anyway, some smartphones may not provide this box, but the focus mechanism is still the same as I described above. Better find out on your smartphone's camera now.
Manual Focus
In some current smartphone cameras provide a manual focus setting that way pengoperasiaan follow the DSLR lens style, only this is packed in digital form. Take a look at the image below:
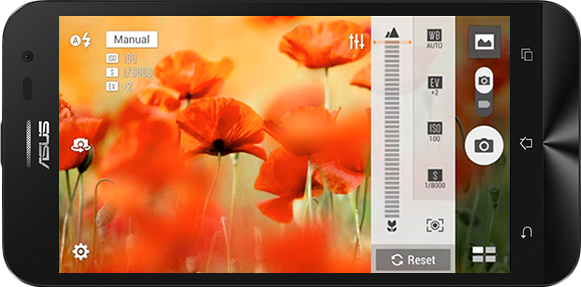
How it works You just have to touch the focus lever on the screen then shift it up and down or left-right until the subject is completely focused. It's like when we turn the focus ring of the DSLR lens to set the focus, so the gain can train you to learn to lock focus manually and get to know how to focus on the DSLR camera lens. This is actually the latest focus mechanism in addition to the touch focus mechanism I'm talking about above. There's even a smartphone camera that uses two choices of focus mechanisms at once.
Focus Macro and Infinity Focus
This is still part of the manual focus discussion above. Consider the manual focus image above, notice what I circled in yellow. At the lowest focus is marked with a flower icon that is "focus macro". When the focus lever is placed into the focus of the macro then the focus of your smartphone's camera will be within the closest focusing distance (MFD). This is used for photographing a small subject within a very short distance, depending on the camera focal distance capability of your smartphone. Examples such as catch the subject of flowers, toys, food, etc.
How to use it is very easy, you just need to shift the lever and set it to the flower icon. Then please bring your camera closer to the subject you want to capture. Be sure to keep your camera's proximity to the distance at which the subject has focused. So the focus mechanism here is done by bringing your camera closer to the subject.

The highest focus marked by the "8" number icon is the infinity focus or "infinity focus". Infinity focus is used to capture scenic scenes (landscape), therefore usually also this infinity using the image icon mount. How it works the same as in macro focus, you just need to shift the lever and set it at infinity focus, then please do the shooting. So if you want to take landscape shots from a distance or shoot at night, then use this infinity focus to produce sharp images.
Exposure Value (EV)
This one setting is also almost there on all smartphone cameras. If your smartphone uses the Indonesian language, this setting generally has the name "Opening Value" or "Exposure Value". The function of the EV is similar to ISO, which is a practical way to adjust the brightness of the image. You beginner will be confused if I explain at length. So I simplified this explanation. See the comparison of images below which is the result of different EV values:


Generally on smartphone cameras do not provide manual control over exposure, except ISO. While the exposure itself is formed by three elements of the shutter speed, aperture and ISO. Well, the mechanism of shutter speed and aperture is still there, it's just controlled by the program. But by changing the setting of EV then the same we have changed the value of shutter and aperture (if available). But lately many smartphones that already provide shutter speed settings. Neither with aperture.
Shutter Speed
The most significant innovation to the current smartphone camera is the availability of manual control of shutter speed or shutter speed. Even some smartphones provide a slow shutter setting of 30sec. This value is sufficient enough to be used for photographing the Milky Way. This shutter speed has a role in the process of taking light. The slower the shutter works the more light the camera will receive, and vice versa. So if you want your smartphone camera to capture more light regardless of ISO, then the solution can be by lowering the shutter speed as necessary. It's just that the fast and slow shutter work has an impact on subject movement. Very fast shutter can freeze subject movement, while slow shutter will cause the subject movement to be shaded (motion blur).

So what can you do with this shutter setting? If your smartphone camera provides a slow shutter setting then you can do a "long exposure". And if that is available just a quick shutter setting then you can use that to capture the levitation scene (the subject jumps in the air).
Aperture / Diaphragm / Opening
This one arrangement has many names ie aperture / diaphragm / opening. Simply put, the aperture is about the size of the hole in the lens and therefore also called the lens opening. The smartphone camera also has a lens that generally consists of one optic. So the size is thin and looks almost no have any lens. It's like a glasses lens construction. Smartphones used aperture fixed (fixed), so the user can not do anything with the camera aperture his smartphone. But now some sophisticated smartphones already provide aperture variable that is aperture hole that can be changeable. Although the aperture changes in most smartphones is determined by the program, but some smartphone cameras already provide access for users to determine how many aperture openings they want.

So what is the function of this aperture? Large aperture holes will allow the camera to receive more light and also increase the blur intensity. Similarly, small holes receive only a small amount of light. Well, if we combine the slow shutter speed with large aperture aperture then we will get light in large numbers too, without having to use a high ISO that can cause noise.
Stabilizer
Stabilizer is a technology created to overcome the vibration of the user's hand when shooting. Therefore I often refer to it as "anti-vibrating". Perhaps you've experienced a situation when you press the button to take a picture and then your hand is accidentally vibrating, causing the image to be shaded. Well, the function of this stabilizer to overcome the problem. Ideally this technology only minimizes, while extreme shocks can not be overcome by stabilizer.

Technology stabilizer on this smartphone vary, there is a digital mechanism, there are optical based and there is a sensor based. While optical or sensor based is better than using digital mechanism. So, if your smartphone camera has this stabilizer feature then it should be enabled always for your smartphone to produce stable and unshaded images.
Anti Red-Eye
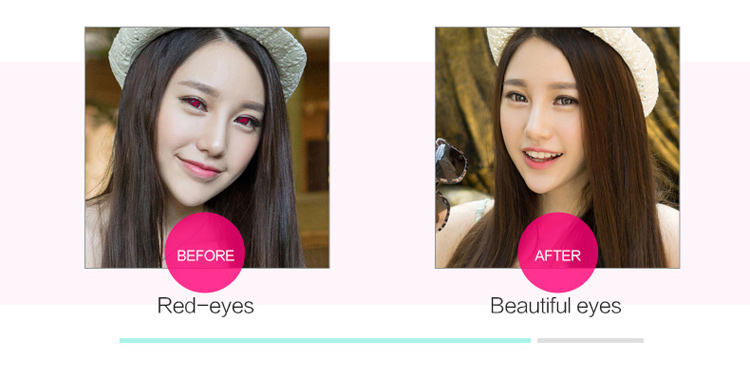
When you enable flash to take a person's face, you may find the subject's eyes red. That's what's called "red-eye". It is predictable that the function of anti red-eye is to reduce the problem of red eyes from direct flash to the eyes of the subject. This technology is merely reducing not really eliminating. Because red-eye is caused by light reflection in the eye area. So in certain circumstances red-eye may still exist even if you enable this feature. But recommended you always activate anti red-eye feature.
RAW Image Format
This is amazing from today's smartphone manufacturers breakthrough. This RAW format does not even exist in the pocket camera type (pocket) and even some Prosummer cameras. But modern smartphone cameras have it. RAW images have many advantages over JPEG format.

In short that this RAW image can allow the user to rectify the captured images with the wrong settings. For example, when you shoot you choose White Balance wrong or choose the ISO value. Well, if you're using the RAW image format then you can still fix all the errors and this is different from editing JPEG images. In fact I never found a smartphone camera with RAW that mampuh merecord focus. That means you can even correct the location of focus in RAW images. It's just that the capacity of RAW files is much larger than JPEG files because RAW record the camera settings used when taking pictures. Therefore use RAW for essential purposes only if you want to save your smartphone memory.
These are some of the most important features and attributes that smartphones currently have. By understanding the functionality and workings of all the settings and features above will help you to maximize your smartphone camera. It also has indirectly introduced you the basic material of photography so this will increase your knowledge of photography and help you to adapt to DSLR cameras later on.