How To Make Windows 10 Boot Faster
How to Speed Up Boot and Start Windows 10 With Fast Startup.
Fast Startup (also called Hybrid Boot) is a new feature introduced in conjunction with the launch of Windows 8. This feature aims to speed up boot and startup by saving copies of drivers and kernels to files named hiberfil.sys. This file is located on the partition where the Windows operating system is installed.
As you may know, hiberfil.sys files are commonly used by hibernate features, but since Windows has Fast startup features, these files are used by the operating system to store previously loaded kernel drivers and kernels so that when Windows reboots startup and booting will be faster than usual.
Because Windows stores drivers and kernels to a hiberfil.sys file where this file is used by the hibernate feature, to enable Fast startup you should also enable the hibernate feature. Unwittingly, Windows creates a hiberfil.sys file when the hibernation feature is enabled. For that, make sure the Hibernation feature is enabled on your PC before continuing.
By default, the Fast startup feature is enabled and used every time Windows boots and starts (restart exception). But if you feel your PC slowly slows down, try checking the Fast startup feature.
Turn on and off Fast Startup in Windows 10
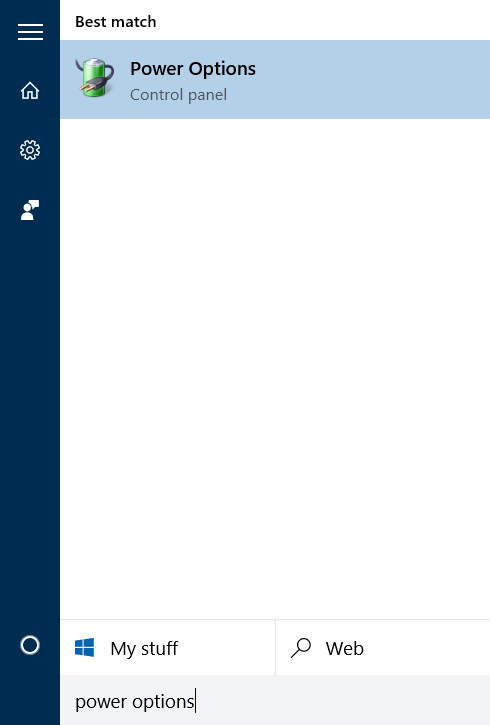
Step 1: Type Power Options in the Start menu and press Enter to open the power settings window.
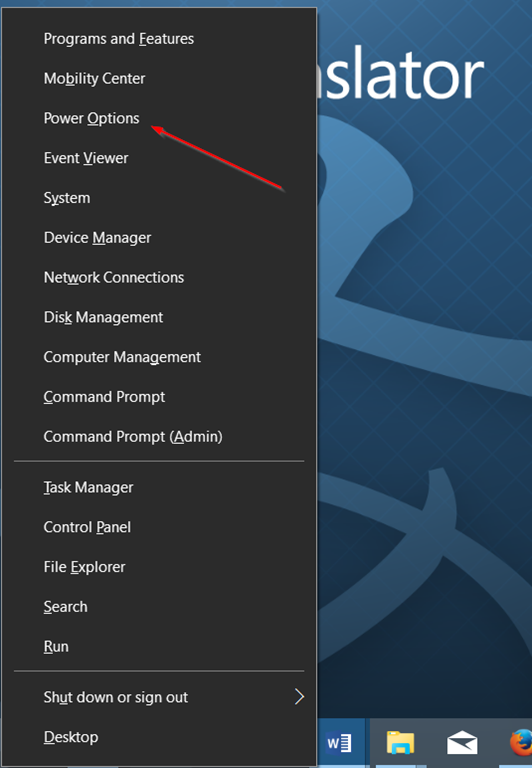
Another way is to right-click the Start menu and select Power Options.
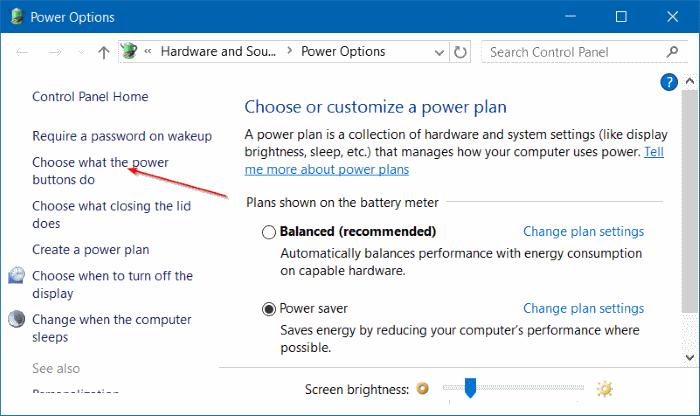
Step 2: On the left side, click the link with the title Choose what the power buttons do to open the system settings window.
Step 3: Here, click the link with the title Change settings that are currently available.
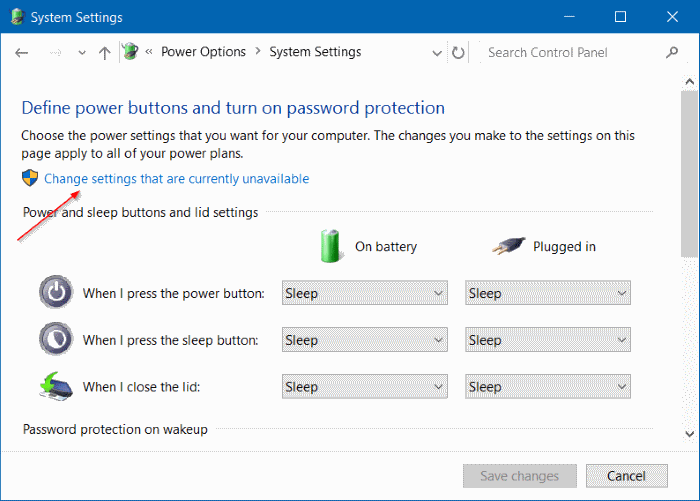
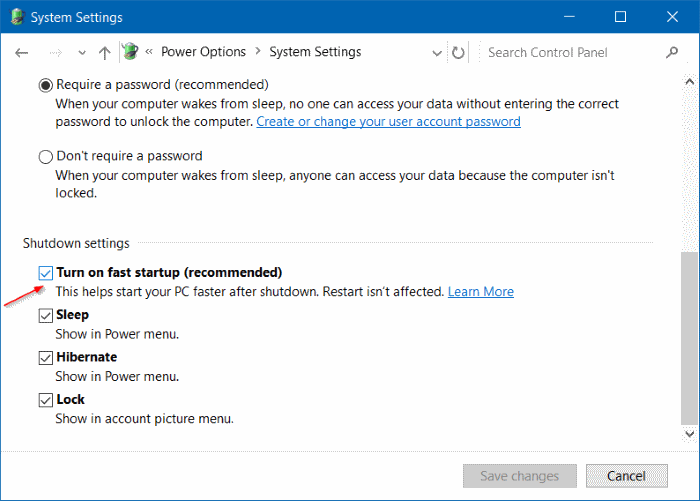
Step 4: Scroll down, in the Shutdown settings section, tick the box with the Turn on fast startup (recommended) label to enable the fast Startup feature. If the option is not checked, the fast startup feature is disabled. After making changes, click the Save changes button.
And if on your PC the option of fast startup does not appear or is not available, as I have written above, it is because the hibernation feature is turned off. You need to enable hibernation feature first and then repeat the steps given above.
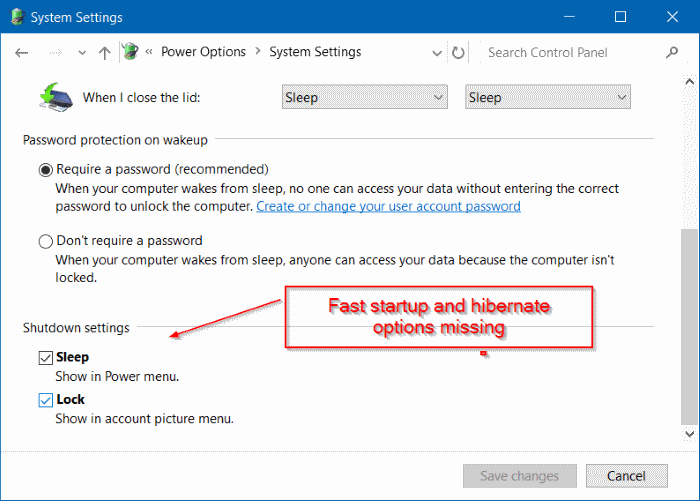
If the hibernate feature is already turned on, you should see the Hibernate option in the Shutdown settings section just above the Sleep and Lock option.
How to Enable and Disable Fast Startup Using the Registry
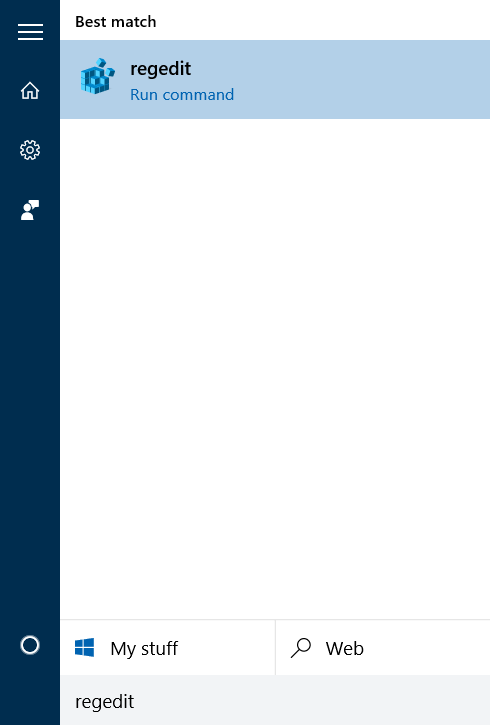
Step 1: Open Registry Editor by typing Regedit in Start menu and press Enter.
Step 2: After the Registry Editor window opens, locate the following key.
HKEY_LOCAL_MACHINE\SYSTEM\CurrentControlSet\Control\Session Manager\Power
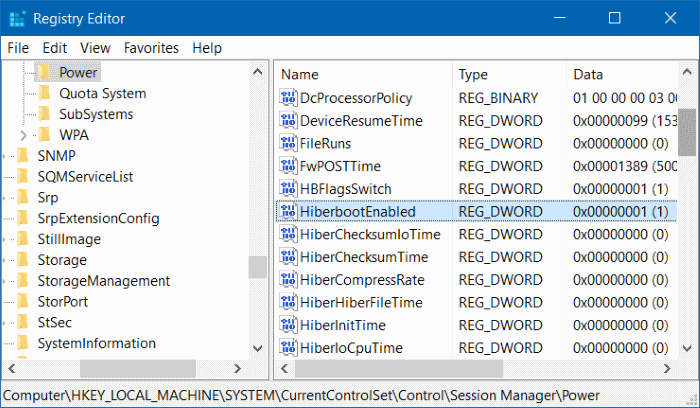
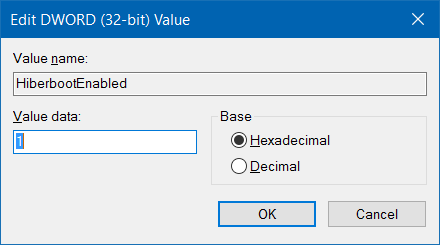
Step 3: On the right side, locate the entry named HiberbootEnabled. Double-click the entry and change the value to 1 (one) to start fast startup and set 0 (zero) to disable the feature.
How to Manage Applications Runs Automatically When Windows Logins
The number of applications that run automatically at startup also affects the fast or slow boot system.
To set it up follow these steps:
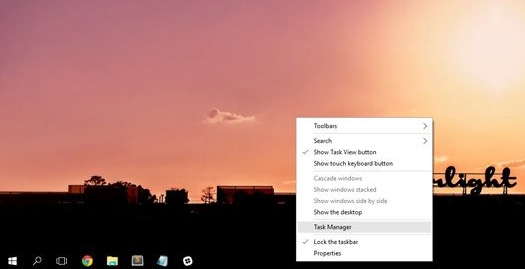
Right-click on the menu section under Windows 10, then select Task Manager
Next will appear Task Manager view. You will see some tabs, select the Start-up tab to see what programs are running on startup. So it looks like below.

You can see if there are some apps running at startup with Enable status. To turn it off simply by right clicking the app and select Disable.

Then later when the computer first turns on, the program will not run again at the beginning of windows live / computer is turned on

Choose the app that you really need when you first open the computer, but besides that you should also pay attention to the 'Startup Impact'. Because, if the app you want on the Startup Impact is 'High', then maybe you should think 2x because it can take a few seconds to boot.
Hopefully the above tutorial can help you.